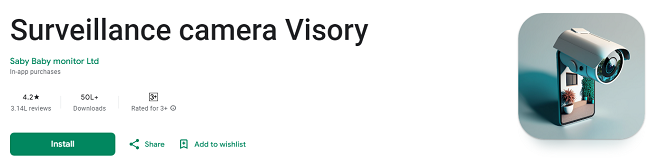
Visory Camera App for Windows PC: Step-by-Step Installation Guide
In today's digital age, having a reliable home monitoring system is essential for ensuring the safety and well-being of your home, family, and pets. One of the most versatile tools available for such purposes is the Visory Camera App, a cutting-edge surveillance app designed to transform your smartphone or tablet into a CCTV camera system. Whether you want to monitor your home, check in on your pets, or keep an eye on elderly family members, Visory provides an affordable and effective solution.
But what if you prefer to use your Windows PC instead of a mobile device for monitoring? You're in luck! The Visory Camera App can be used on your Windows PC too, offering a larger screen and more convenience when monitoring live streams, recordings, and alerts. This guide will take you step-by-step through the process of downloading and using the Visory Camera App on a PC, so you can get the most out of your surveillance system.
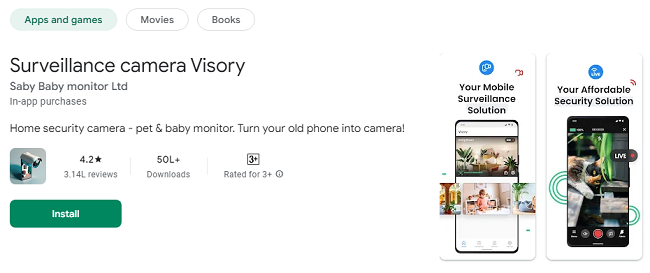
What is the Visory Camera App?
Before diving into the details of how to install and use the Visory Camera App on your Windows PC, it’s important to understand what the app is and how it works. The Visory Camera App is a mobile surveillance solution that allows you to turn any smartphone or tablet into a high-quality CCTV camera system. It is commonly used for:
Home security: To monitor areas of your home in real-time, receive motion alerts, and store footage securely.
Pet monitoring: To keep an eye on your pets when you're away, ensuring their safety and well-being.
Elderly monitoring: To check in on elderly loved ones, ensuring they are safe and comfortable when you can’t be there in person.
The app offers several key features, including live streaming, motion detection, cloud storage, and multi-device integration. While it is primarily designed for smartphones and tablets, you can also set up the Visory Camera App to work on your Windows PC, which can be especially useful if you prefer a larger screen for surveillance or if you don’t want to use a mobile device constantly.
Why Use Visory Camera App on Your Windows PC?
There are several advantages to using the Visory Camera App on your Windows PC instead of a mobile device:
Larger Screen: Monitoring your home or pets is more convenient on a larger screen. With your PC, you’ll have a clear view of your live video feed, making it easier to spot any suspicious activities or keep an eye on your pets.
Better Multitasking: With a PC, you can easily run multiple apps simultaneously. This is useful if you want to monitor different camera feeds at the same time or use your computer for other tasks while keeping an eye on your surveillance system.
More Storage Space: PCs typically offer more storage than mobile devices, allowing you to store more video footage, recordings, and backups securely.
Constant Availability: If you’re at your computer most of the day, setting up the Visory Camera App on your Windows PC means you don’t have to rely on your phone’s battery life or memory space for constant monitoring.
How to Download & Use Visory Camera App on Your Windows PC?
While the Visory Camera App is primarily designed for Android and iOS devices, you can still run the app on your Windows PC through an Android emulator. An emulator allows you to simulate an Android environment on your PC, enabling you to install and run Android apps just like you would on a smartphone or tablet. Here’s how to get started:
Step 1: Install an Android Emulator on Your Windows PC
To use the Visory Camera App on your Windows PC, you need to install an Android emulator first. Popular emulators like BlueStacks, NoxPlayer, or LDPlayer allow you to run Android apps on your PC seamlessly. Below, we’ll guide you through using BlueStacks, which is one of the most popular and user-friendly emulators.
1.1. Download BlueStacks
Open your web browser and visit the BlueStacks website (https://www.bluestacks.com).
Click on the Download BlueStacks button to download the installer file for Windows.
1.2. Install BlueStacks
Once the download is complete, open the installer file.
Follow the on-screen instructions to install BlueStacks on your Windows PC. It may take a few minutes depending on your internet connection and computer speed.
After installation, launch BlueStacks from your desktop or Start Menu.
1.3. Set Up BlueStacks
When you first open BlueStacks, you’ll be prompted to sign in using your Google account (similar to setting up a new Android phone).
Enter your credentials or create a new account if you don’t have one.
Once you’re signed in, BlueStacks will be ready to download and run Android apps on your PC.
Step 2: Download the Visory Camera App on BlueStacks
Now that you have an Android emulator set up on your Windows PC, you can download the Visory Camera App just like you would on an Android device.
2.1. Open Google Play Store in BlueStacks
Launch BlueStacks and open the Google Play Store app from the BlueStacks homepage.
In the search bar at the top of the Play Store, type "Visory Camera App".
2.2. Install the Visory Camera App
Click on the Visory Camera App in the search results.
On the app’s page, click the Install button.
Wait for the app to download and install. This should take a few moments.
2.3. Open the Visory Camera App
Once the installation is complete, you can open the Visory Camera App directly from BlueStacks.
If prompted, sign in with your Visory account or create a new account.
Step 3: Set Up the Visory Camera App on Your Windows PC
Now that the Visory Camera App is installed on your Windows PC, it's time to set it up. The setup process is very similar to using the app on a mobile device, except now you can enjoy the larger screen and more convenient interface of your PC.
3.1. Connect Your Camera Device
The Visory Camera App allows you to link multiple devices together to create a surveillance system. You’ll need at least two devices for this process:
Device 1: This will be your camera device, where you’ll set up the video capture. This can be any smartphone or tablet.
Device 2: This will be your monitor device, which in this case, is your Windows PC.
To link your devices:
Open the Visory Camera App on both your Windows PC (monitor) and your smartphone/tablet (camera).
On the PC, select the Monitor option and follow the prompts to set up the viewing device.
On your smartphone/tablet, select the Camera option, which will activate the camera and start the live feed.
Use the QR code scanning method to link the devices. A QR code will appear on your Windows PC, which you can scan with your smartphone/tablet.
Once the devices are linked, the live video feed from your smartphone/tablet will appear on your Windows PC screen.
3.2. Configure Your Settings
After linking your devices, you can customize the app’s settings according to your needs. Some important settings to consider include:
Motion and Sound Detection: Enable this feature to receive alerts when any motion or sound is detected by your camera device. This can be useful for pet monitoring or home security.
Cloud Storage: Set up cloud storage to store all video recordings securely. This way, you can always access your footage from any device, even if your phone or PC is lost or damaged.
Multiple Devices: If you have more than one camera device, you can set them up to monitor different areas of your home. This feature is ideal for a comprehensive home security system.
Step 4: Use the Visory Camera App for Surveillance
With your devices linked and your settings configured, you can start using the Visory Camera App for surveillance. Here are some ways you can use it:
4.1. Home Security
Set up multiple camera devices around your home to monitor different areas. With live video streaming on your PC, you can keep an eye on your front door, backyard, living room, or any other important area.
4.2. Pet Monitoring
If you have pets, use the app to monitor them while you’re away. With features like bark detection, you’ll receive an alert when your dog starts barking, so you can check in on them in real-time.
4.3. Elderly Monitoring
Set up the app to monitor elderly family members and ensure they are safe and well. With the app’s ability to detect movement and alert you to unusual activities, you can have peace of mind knowing that help is only a tap away if needed.
Troubleshooting Tips for Using Visory Camera on Windows PC
While the Visory Camera App is relatively easy to use, you may encounter some issues when running it on your Windows PC. Here are a few troubleshooting tips:
App Not Installing: Ensure that BlueStacks is running correctly. Try restarting the emulator and reinstalling the app.
Lagging or Freezing Video: If the video feed is lagging, check your internet connection. A stable and fast internet connection is essential for smooth live streaming.
Connectivity Issues: Make sure both your camera device and Windows PC are connected to the same Wi-Fi network. If they are not, they may not be able to communicate with each other.
Conclusion
The Visory Camera App is a versatile and powerful tool for home security, pet monitoring, and elderly care. While the app is primarily designed for mobile devices, you can easily use it on your Windows PC by installing an Android emulator like BlueStacks. This allows you to enjoy all the benefits of the app—such as live streaming, motion detection, and cloud storage—on a larger screen with enhanced functionality.
By following the steps outlined in this guide, you’ll be able to download, install, and set up the Visory Camera App on your PC in no time. Whether you’re monitoring your home, checking on your pets, or ensuring the safety of your elderly loved ones, the Visory Camera App offers a reliable and user-friendly solution for all your surveillance needs.
Updates